


Step-by-Step: Migrating from Carrd to Cloudflare Pages
Migrating with Ease: Seamlessly Transition from Carrd to Cloudflare Pages


Carrd.co is a single-page website builder with a no-code paid tool. Cloudflare Pages is a JAMstack platform for front-end developers to collaborate and deploy websites. In this blog post, I will describe how to move your static website from Carrd.co (Paid) to Cloudflare pages (Free). Let's start.
Back story
I got my eyes on carrd.co when I saw it was (still is, AFAIK) the only No-code platform that allows you to create static single-page websites (for portfolio, landing page, etc.) for just $19 per year. Yes, not per month but per year. During the Black Friday week, I got a good deal and upgraded to the highest-ever tier there. However, I soon realize I do not use many features and do not need to update my static sites frequently. Also, I do not feel it is satisfying enough to be a full-stack developer with a No-code tool. No-code tools are excellent for building up something quickly but are a pain to the wallet in the long run. Therefore, I migrated from carrd.co and found Cloudflare pages, a free alternative. Hence this blog post.
Prerequisites
Carrd.co pro account, which supports the download of the website
Cloudflare Account
Website domain hosted in Cloudflare (Optional but Recommended)
GitHub Account (Optional)
Procedure
Download your website
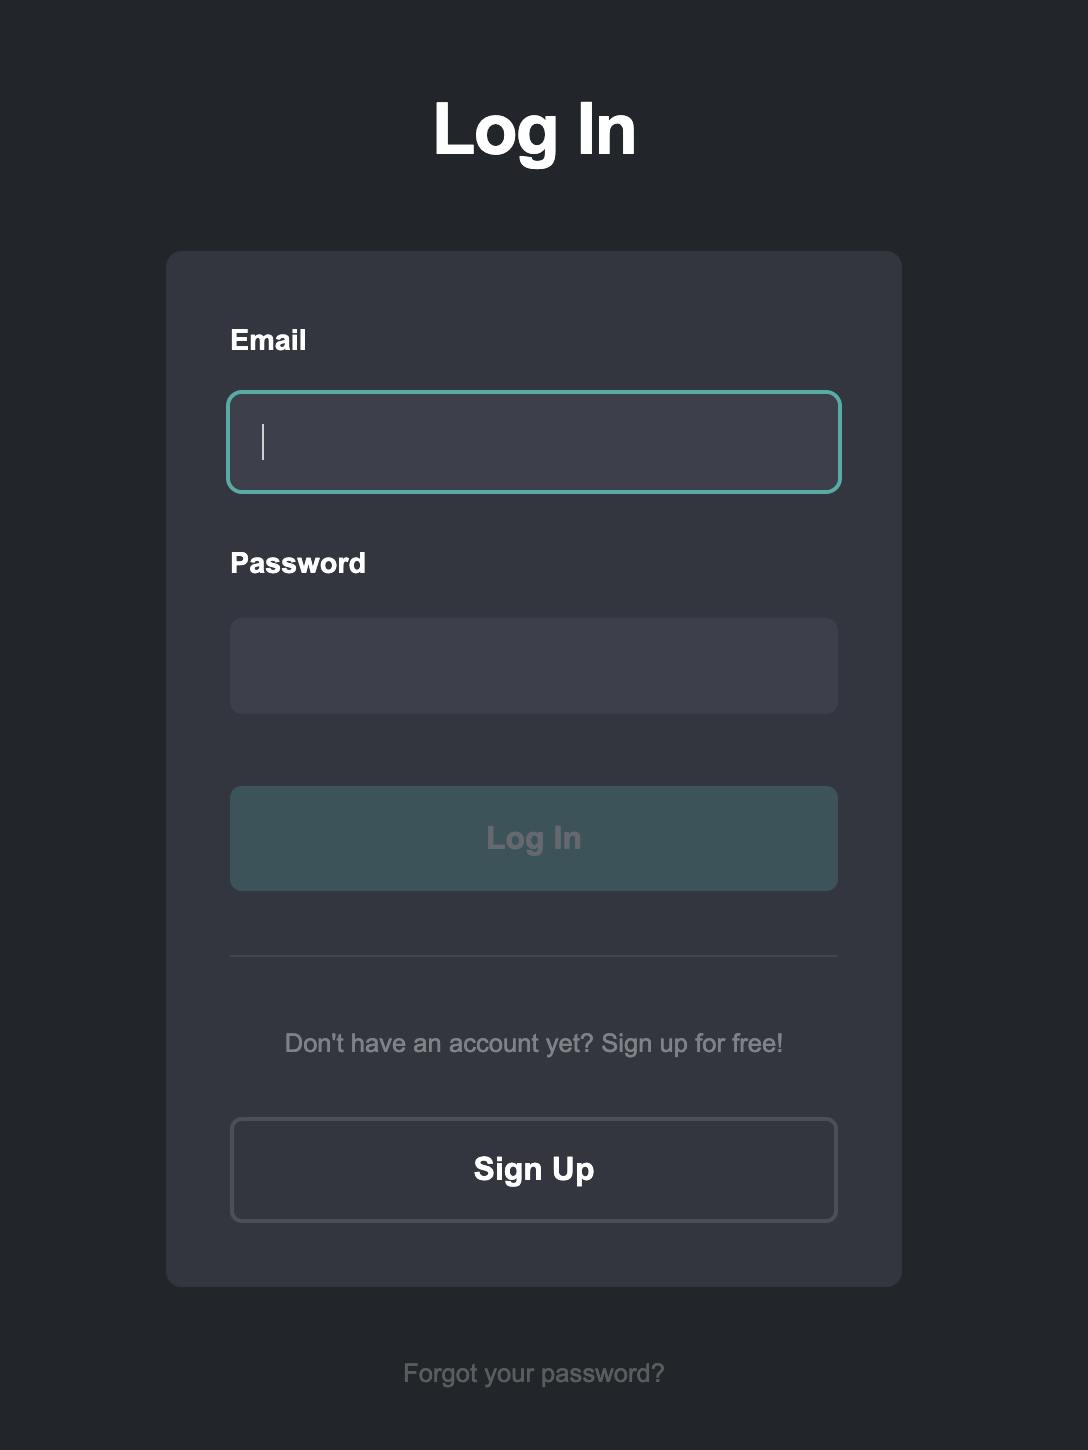
First, log in to your carrd.co account
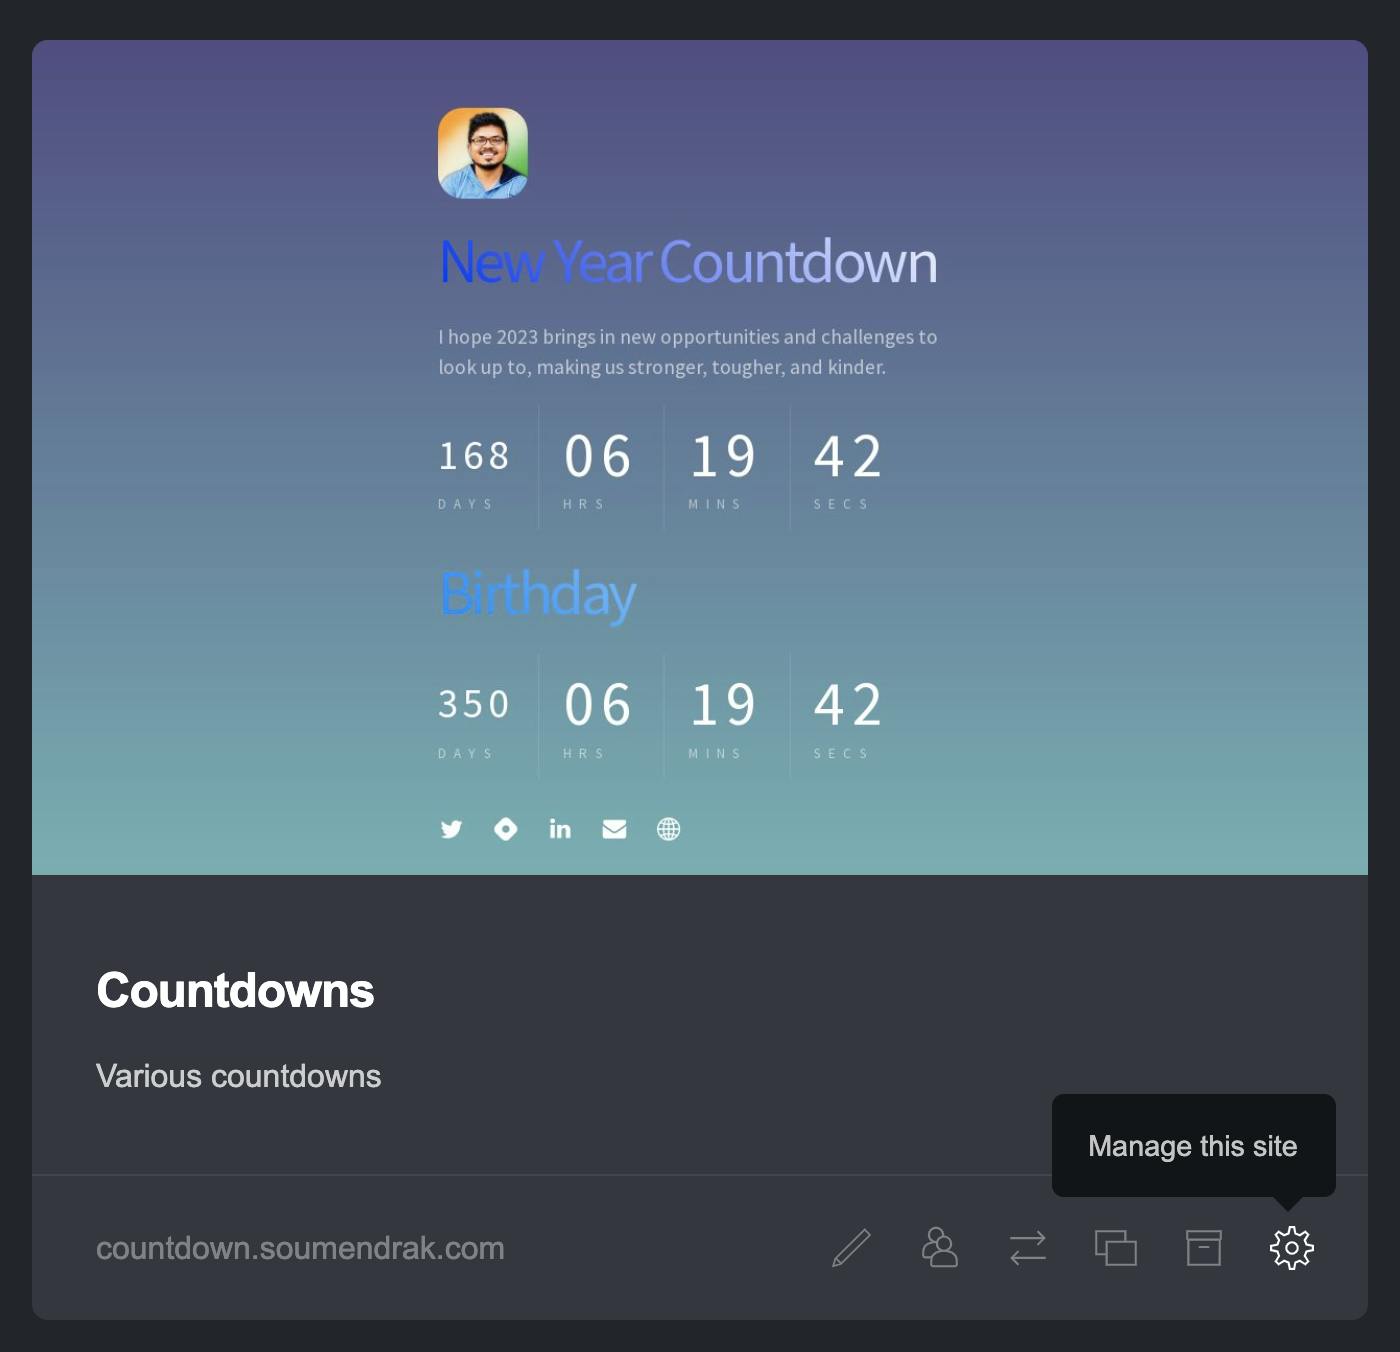
Go to the site you want to migrate. Click on the `Manage this site` gear icon.
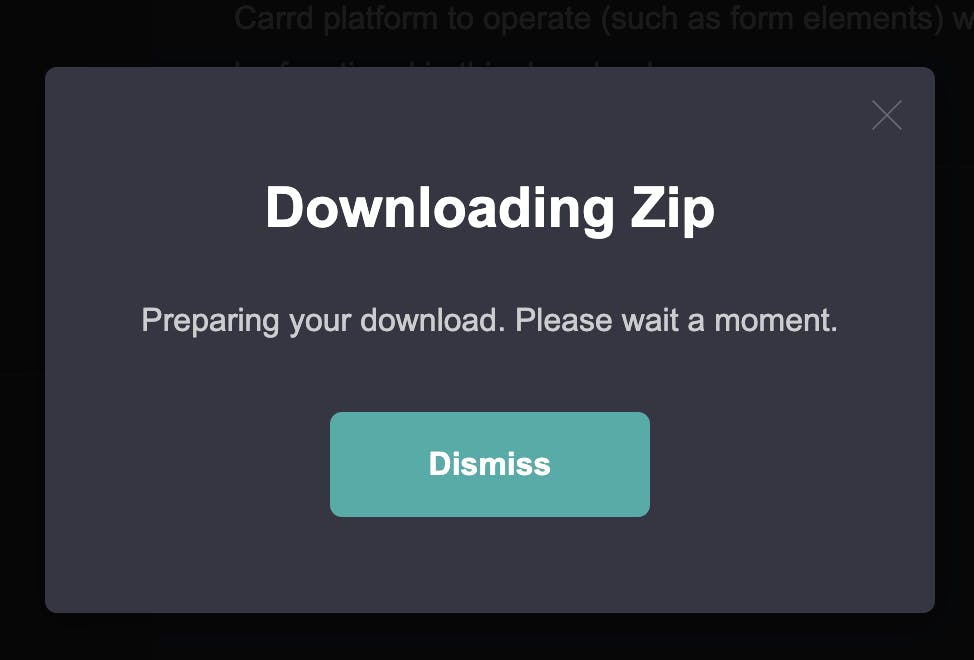
Download the website

Wait for a few seconds till the download gets completed.
Create a GitHub repo.
Though you can directly upload the downloaded file to Cloudflare Pages, we will use GitHub to ease version management for future changes.
Go to https://github.com/new
Feel the details for your repository. Only
repository nameis mandatory to fill.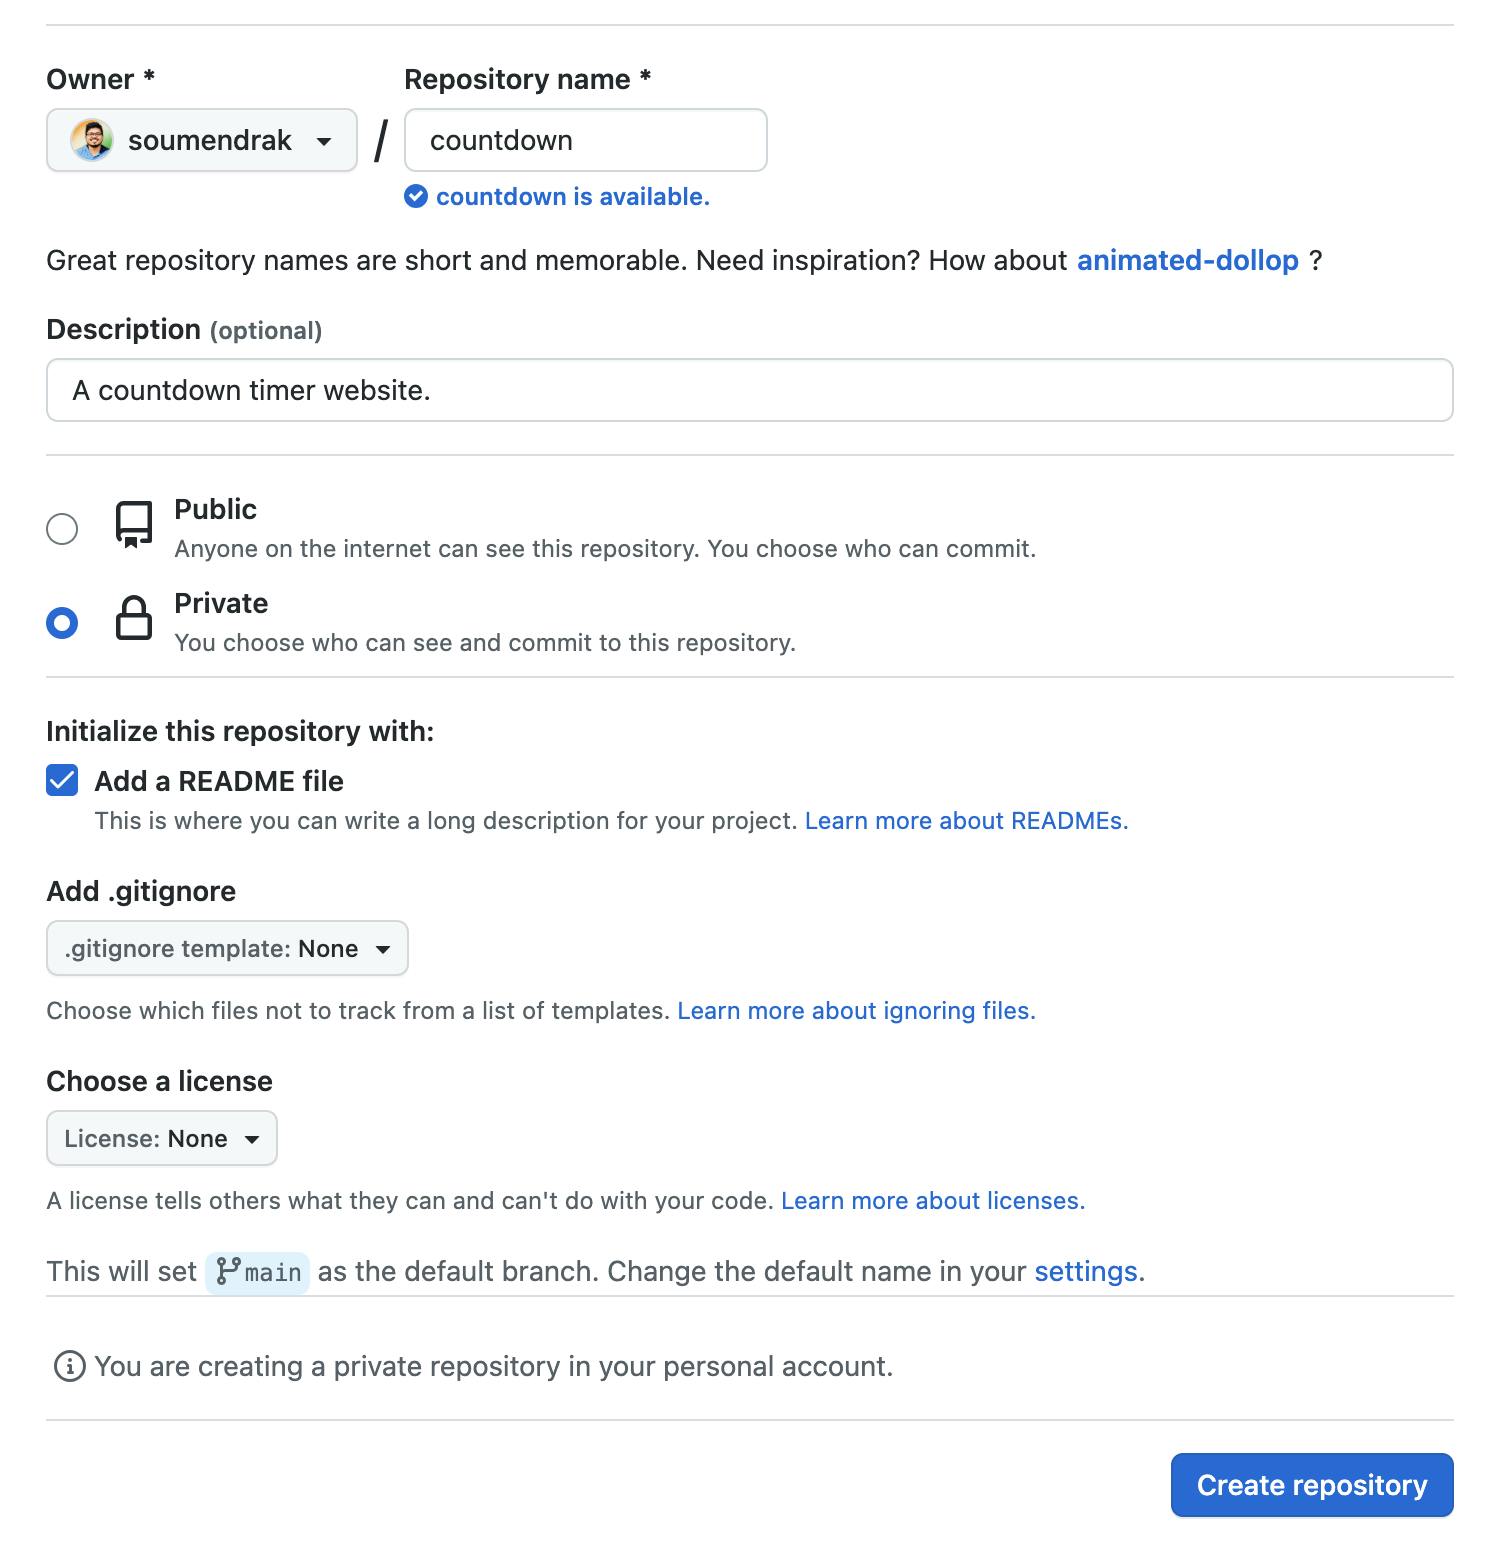
Click on `Create repository` button.
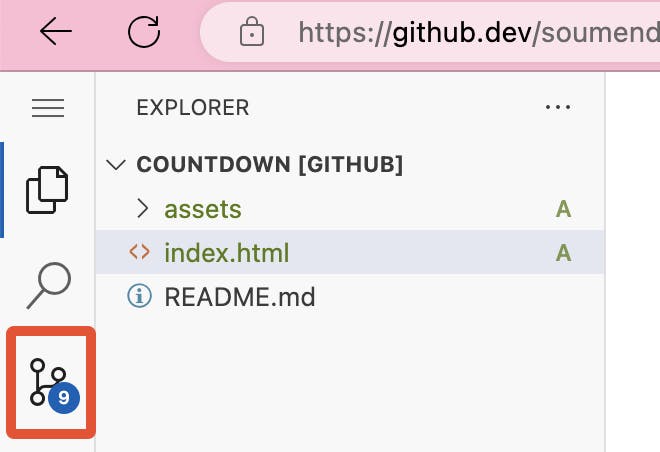
Open the repository in VS Code on the browser by:
Pressing the dot (.) key OR
Change '.com' to '.dev' on the URL. In my case
https://github.com/soumendrak/countdown to
https://github.dev/soumendrak/countdownUnzip the downloaded website content
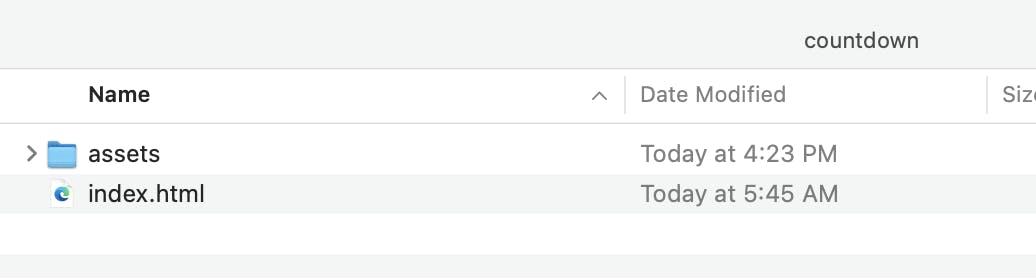
Drag the assets and index.html files and drop them in the VS Code sidebar.

Click on the source control.
Write a comment like 'initial commit' below.
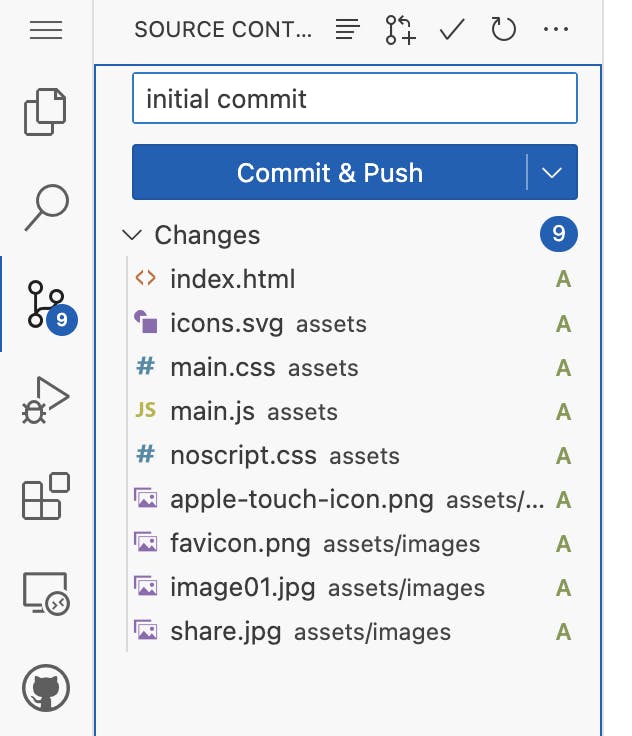
Hover your mouse cursor beside the `Changes` dropdown and Click on the plus (+) icon to stage all the changes.

Click on the `Commit and Push` button.

Cloudflare Pages setup
Now we will link the GitHub repo to Cloudflare Pages. On the Cloudflare page, we will build and host the website. We can create up to 100 websites in Cloudflare pages for free.
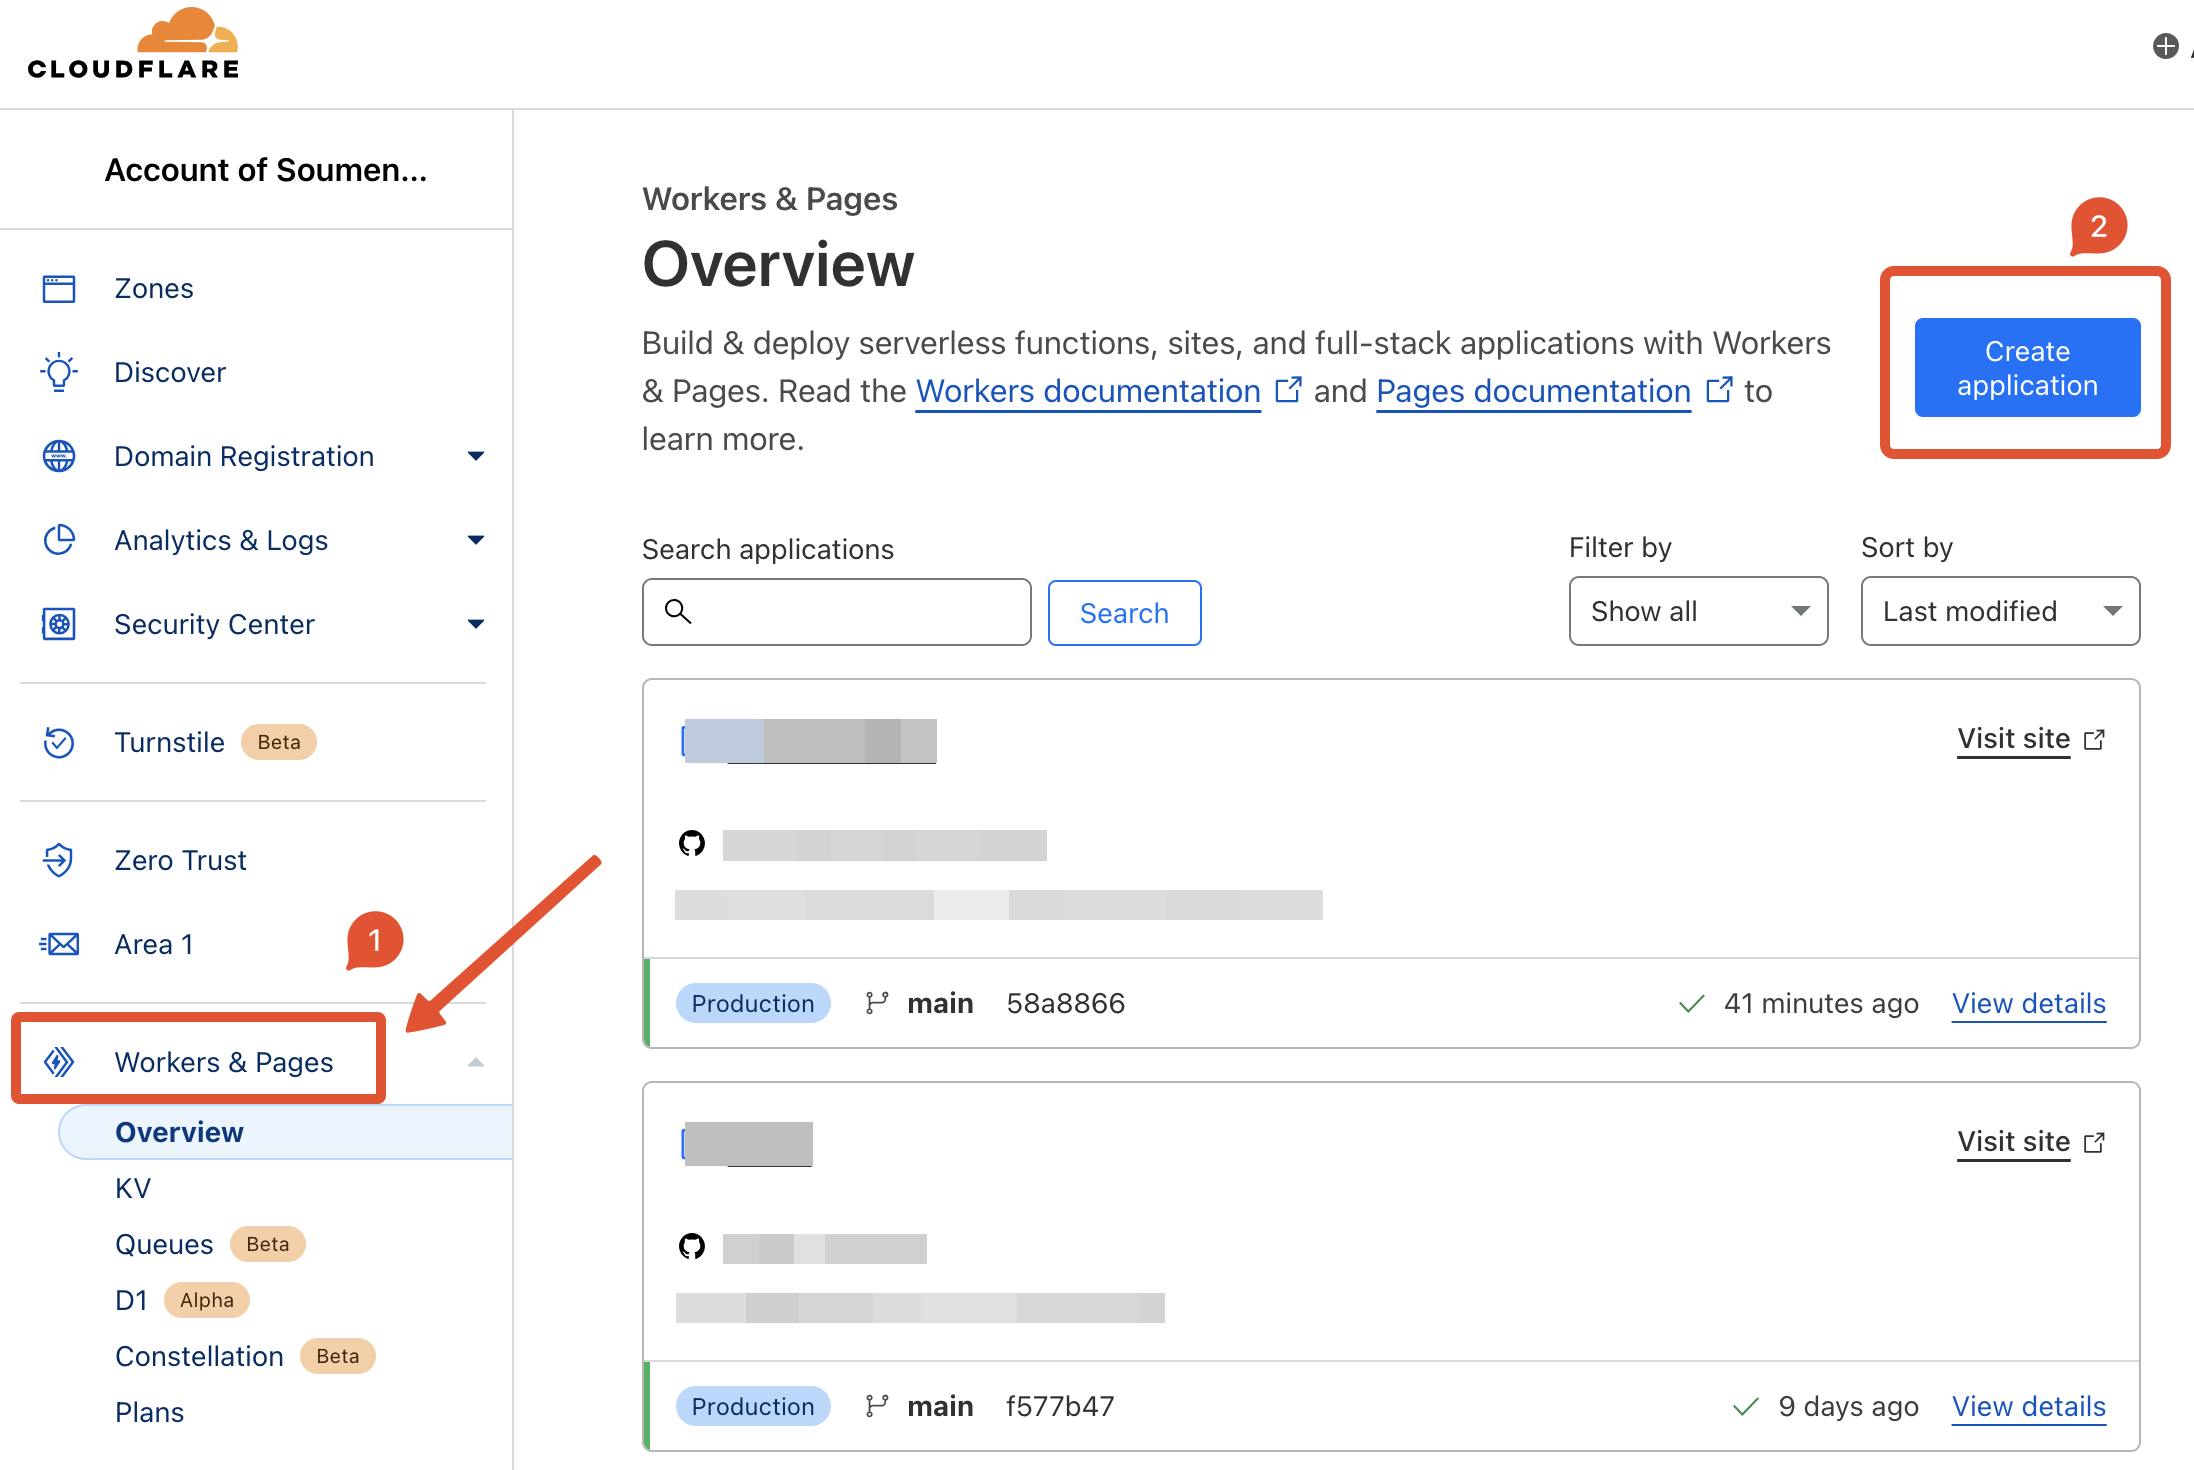
Login to your Cloudflare Account
Click on the 'Workers and Pages' section on the sidebar.
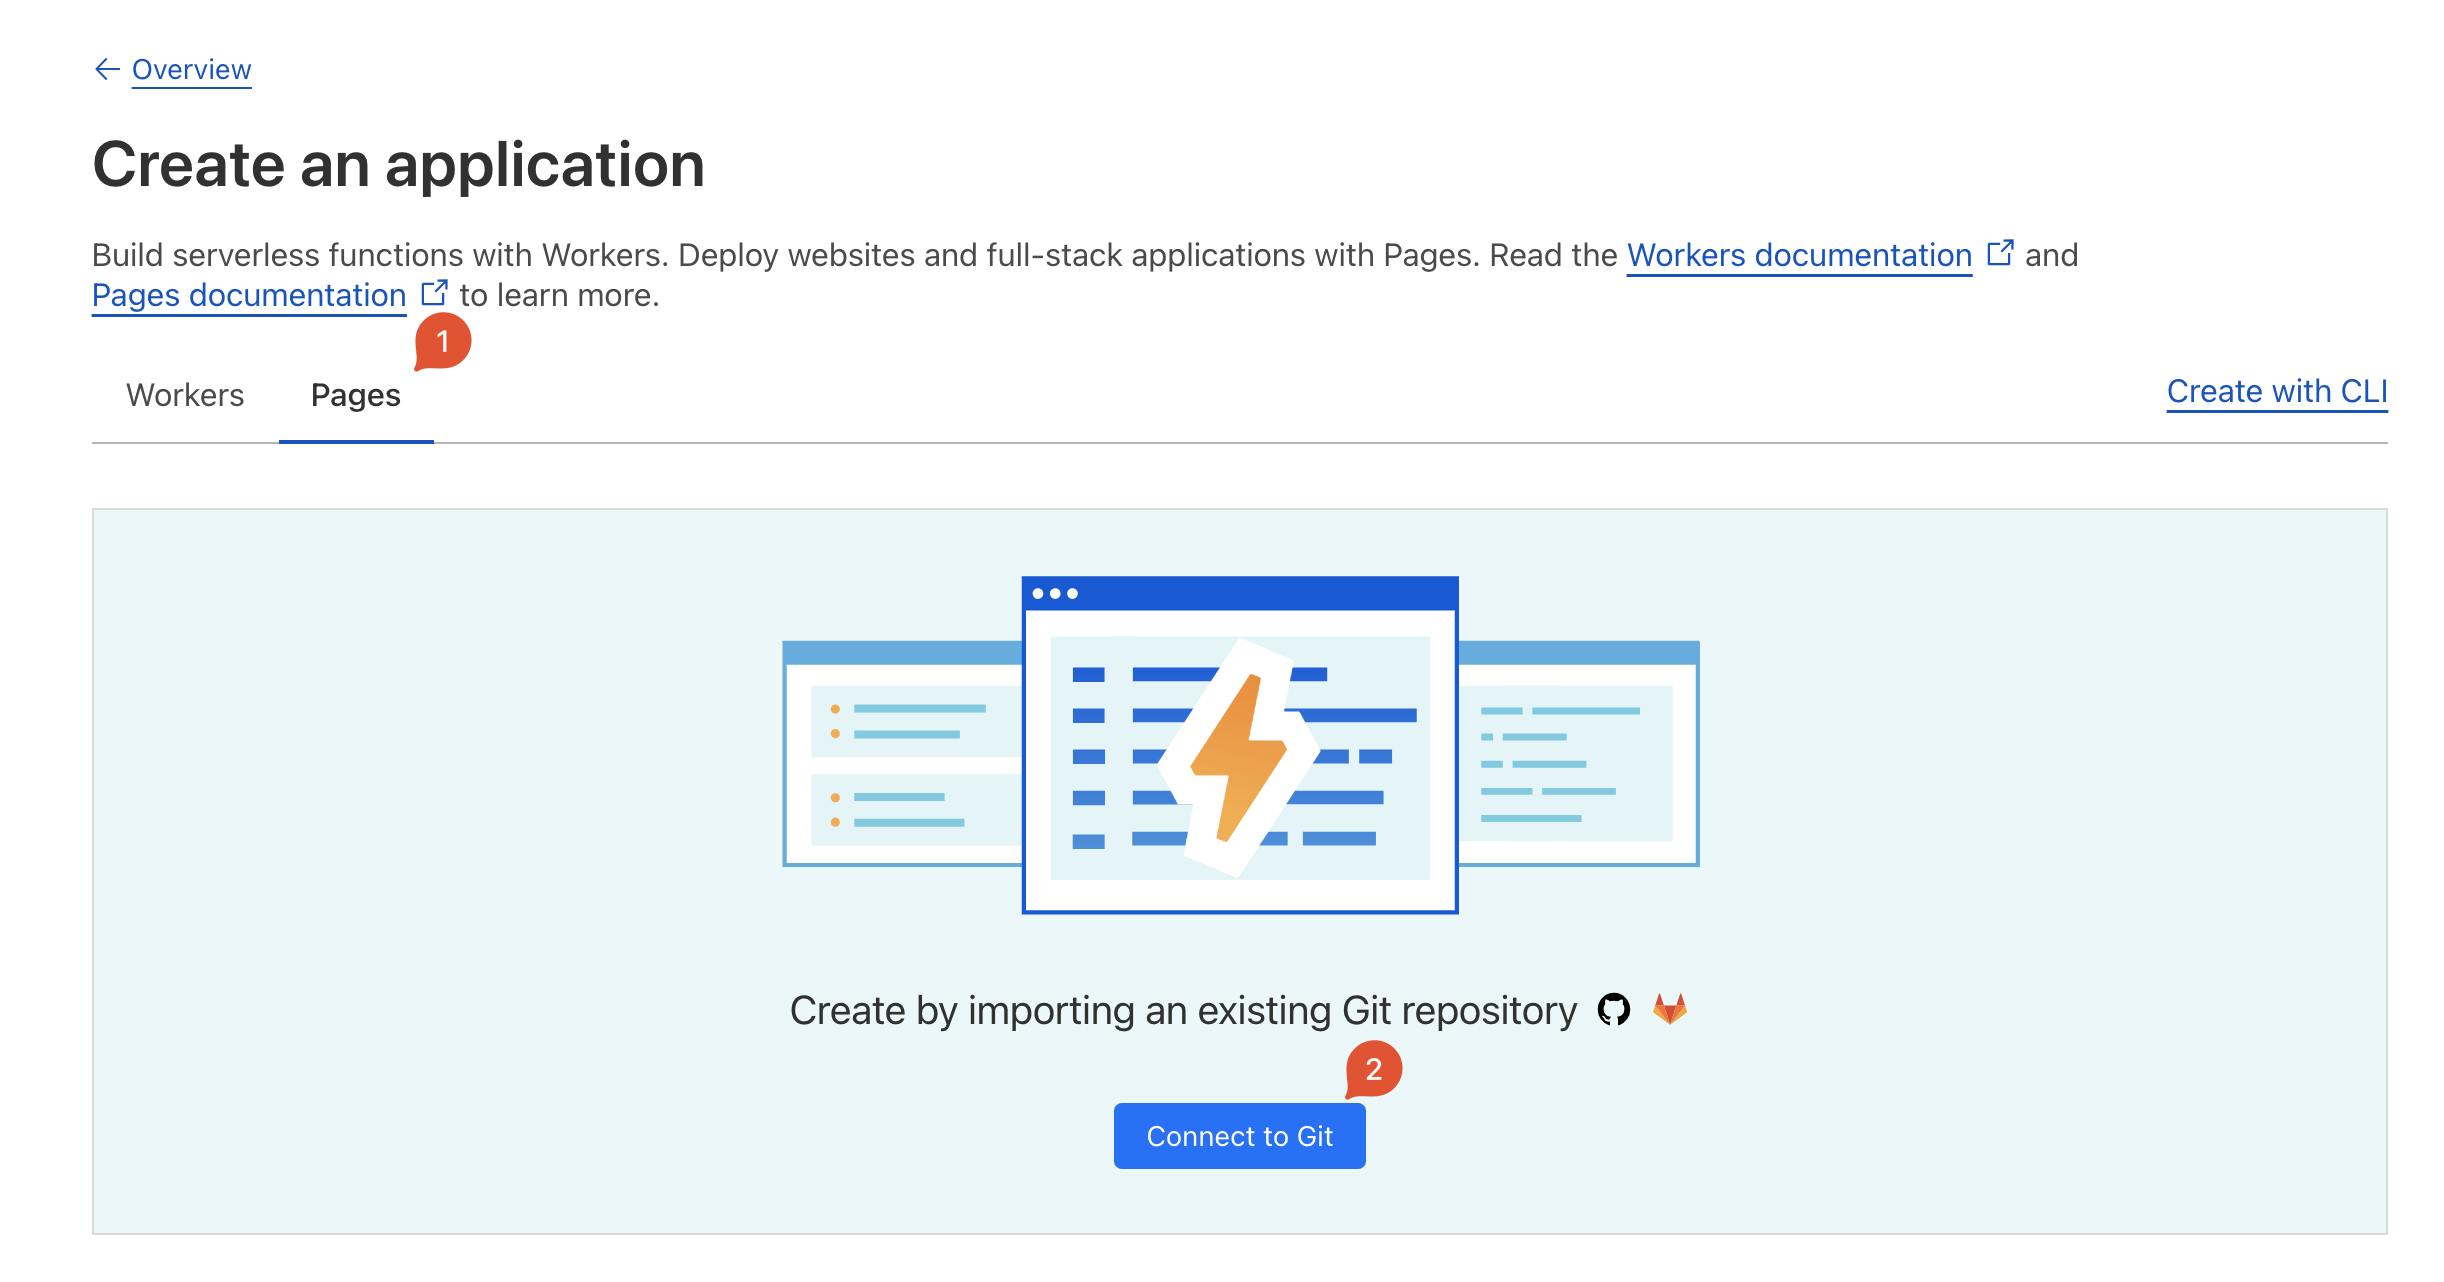
Then click on the 'Create Application' button on the right.
Click on the 'Pages' tab, then on 'Connect to Git.'
Set up GitHub if not done before. Then check if the newly created repository is visible if not, provide access to that repo to Cloudflare by clicking on the Cloudflare pages.
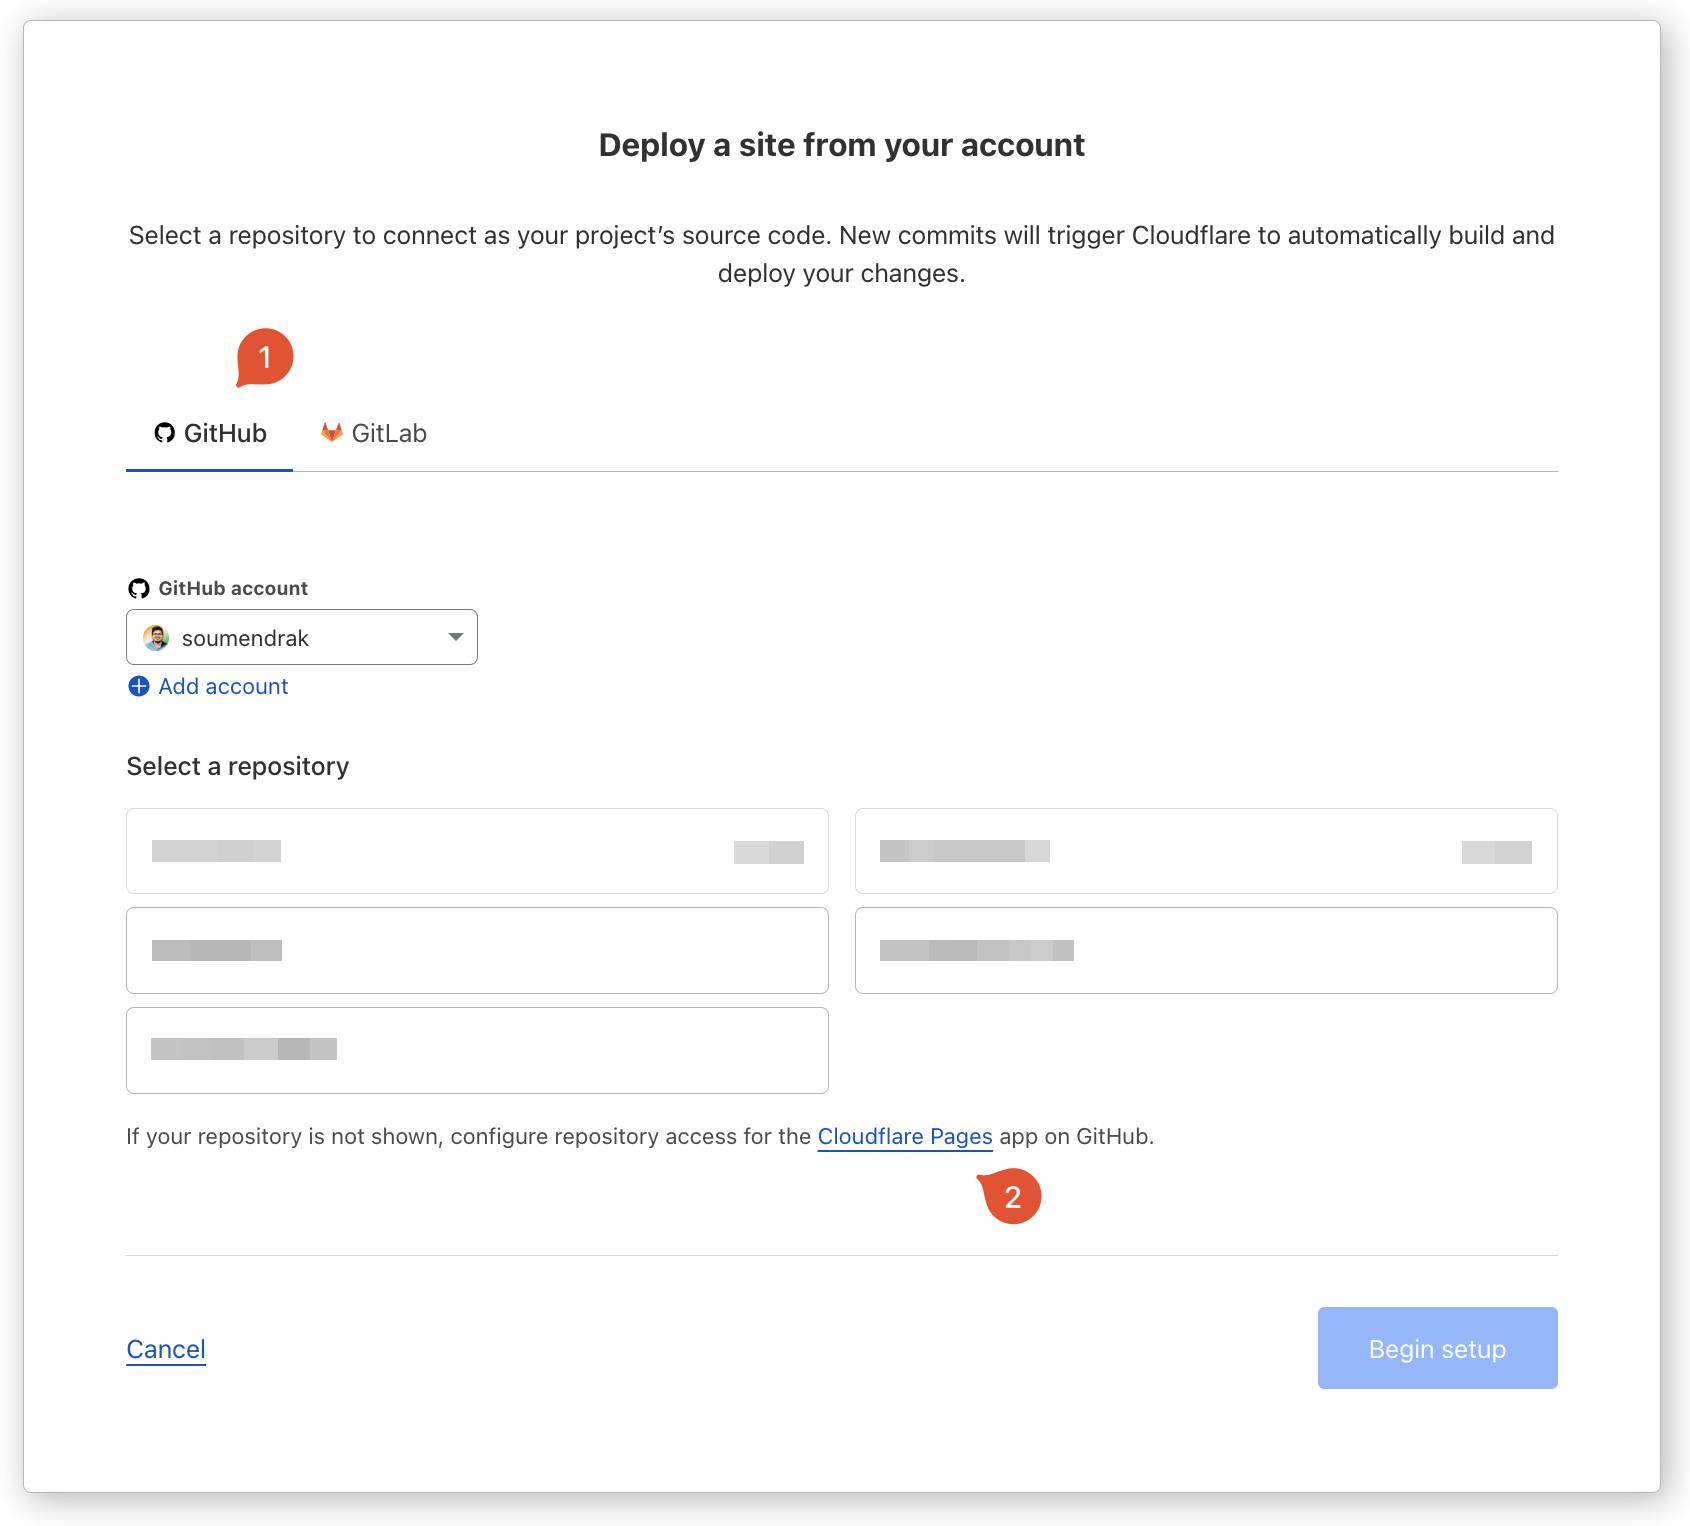
Providing access from GitHub. After selecting, click on Save.

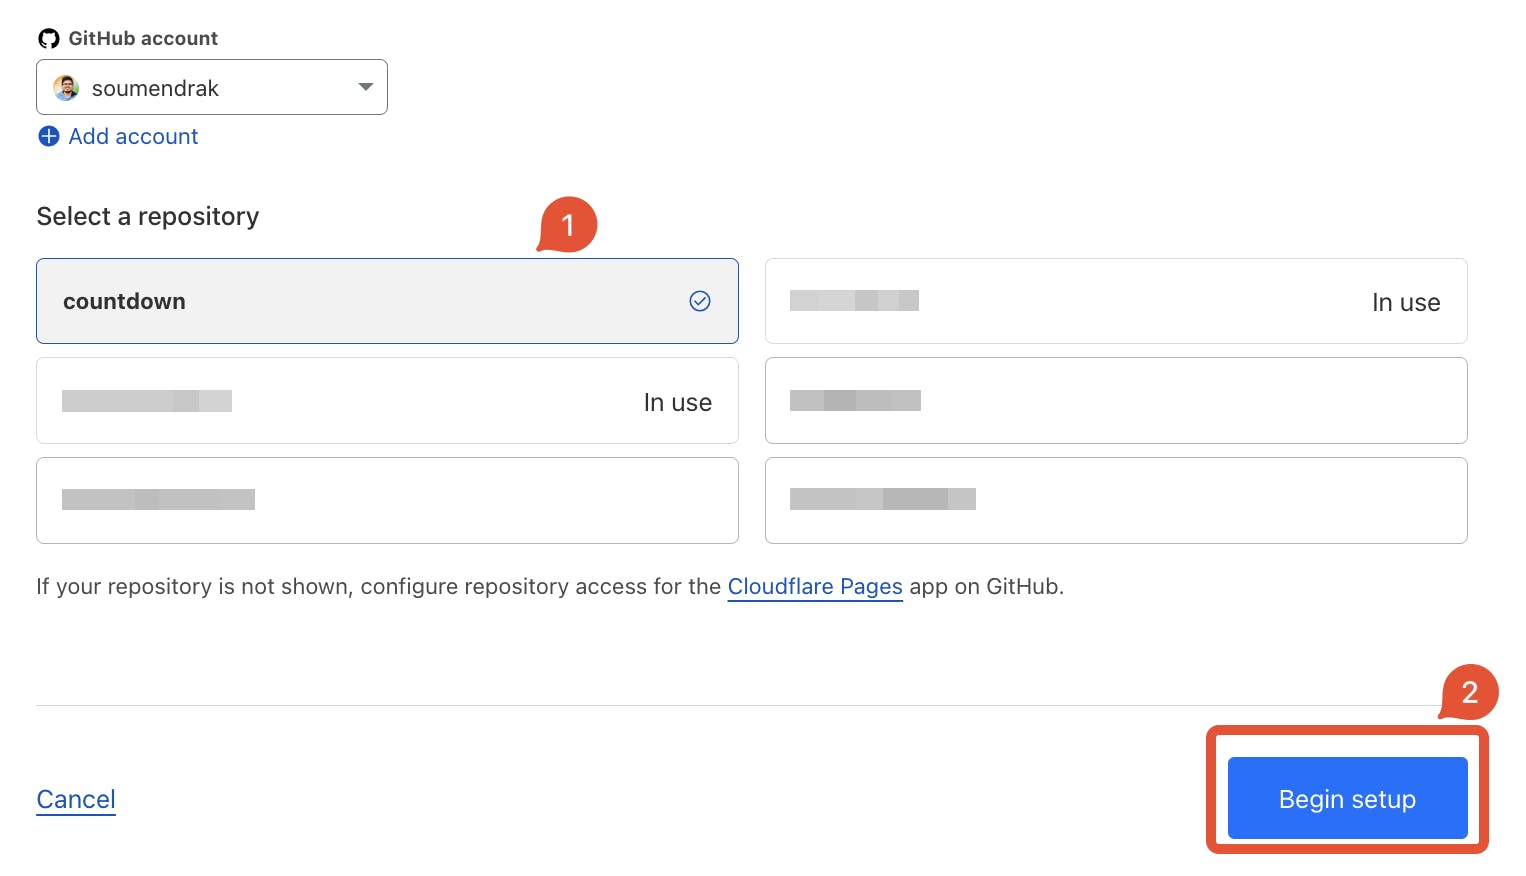
Click on the repo in Cloudflare now by reloading the page or following the same steps from 3 to 6. Click Begin Setup.
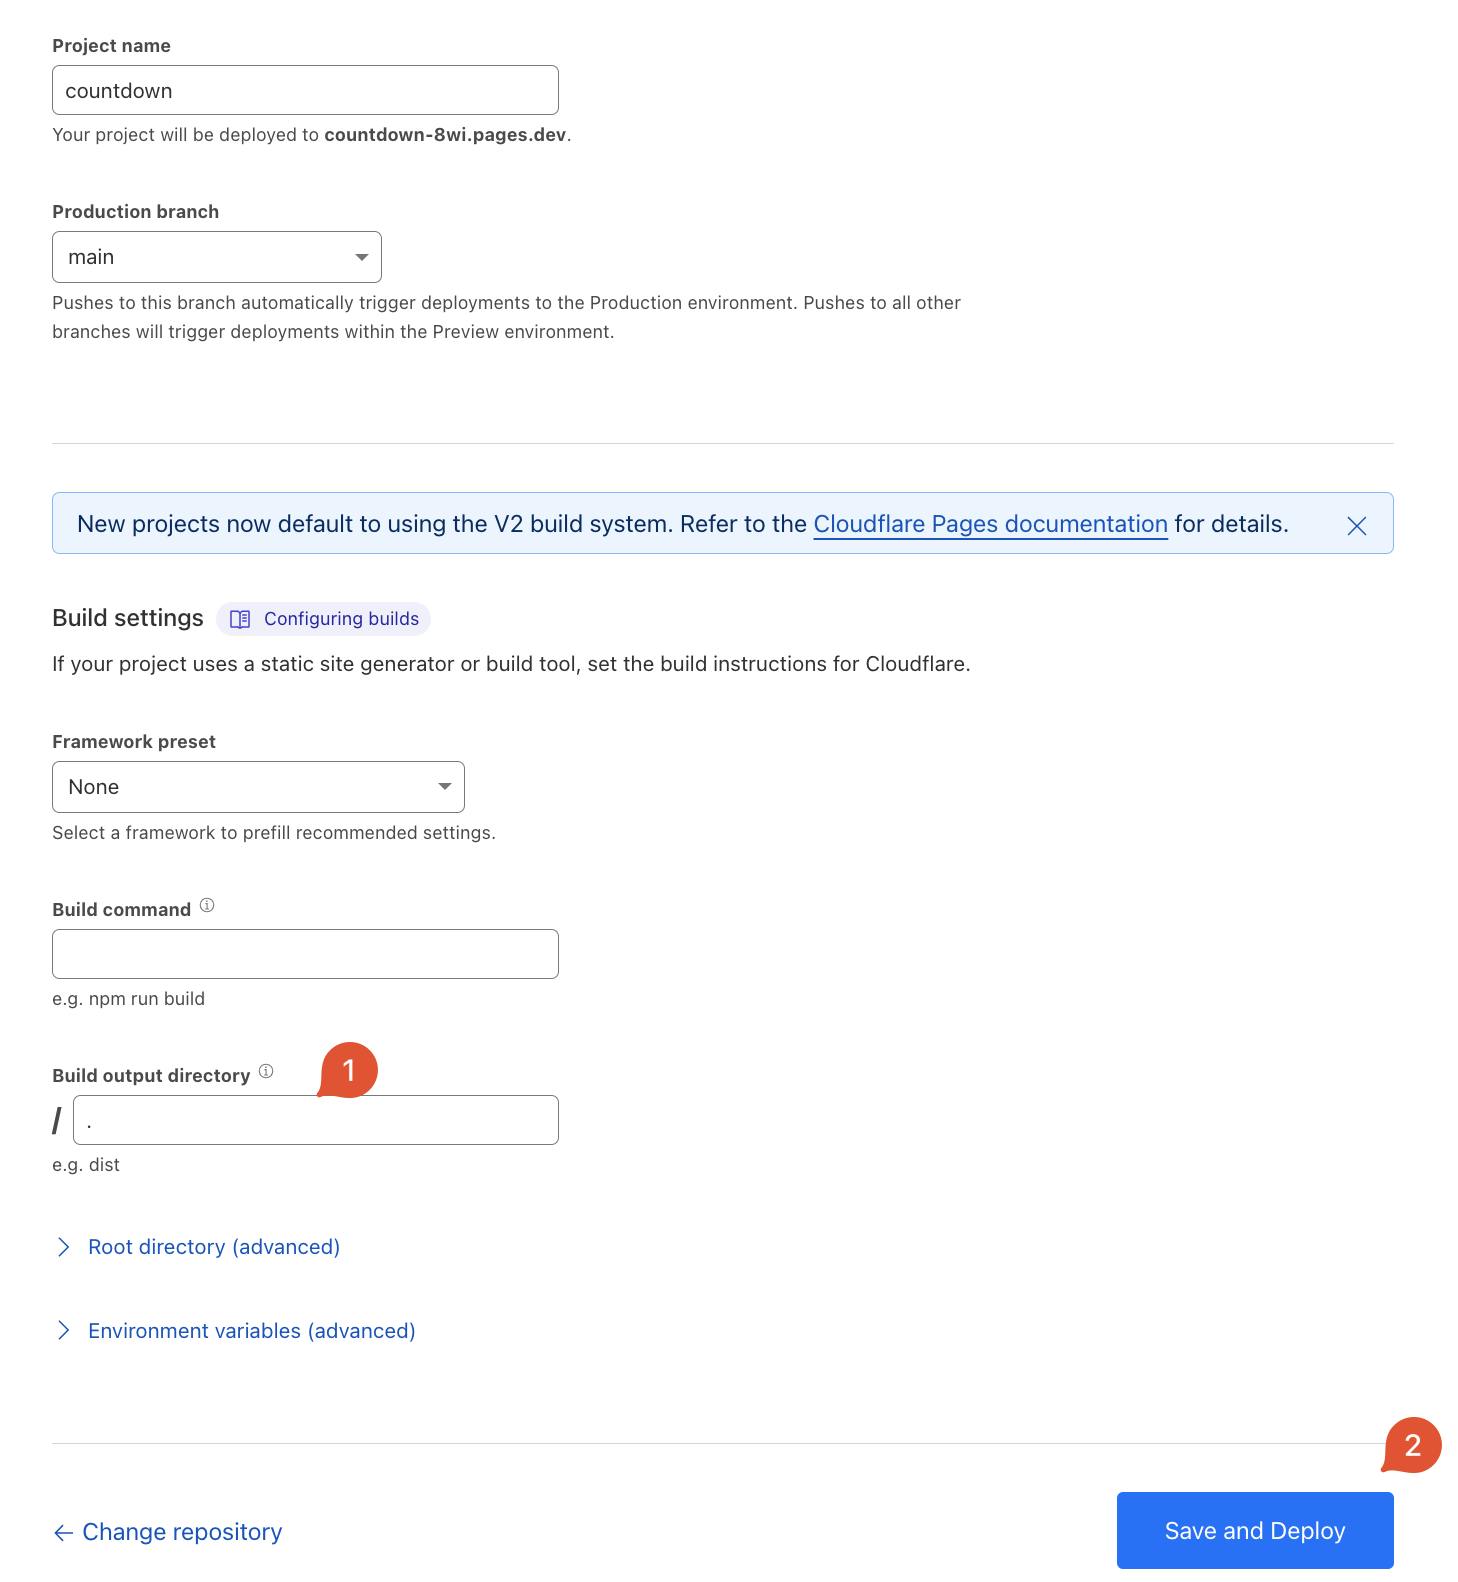
I have a plain static HTML site, so no framework needs to be selected.
Remember to add the current directory as dot (.) in the 'Build output directory' field.
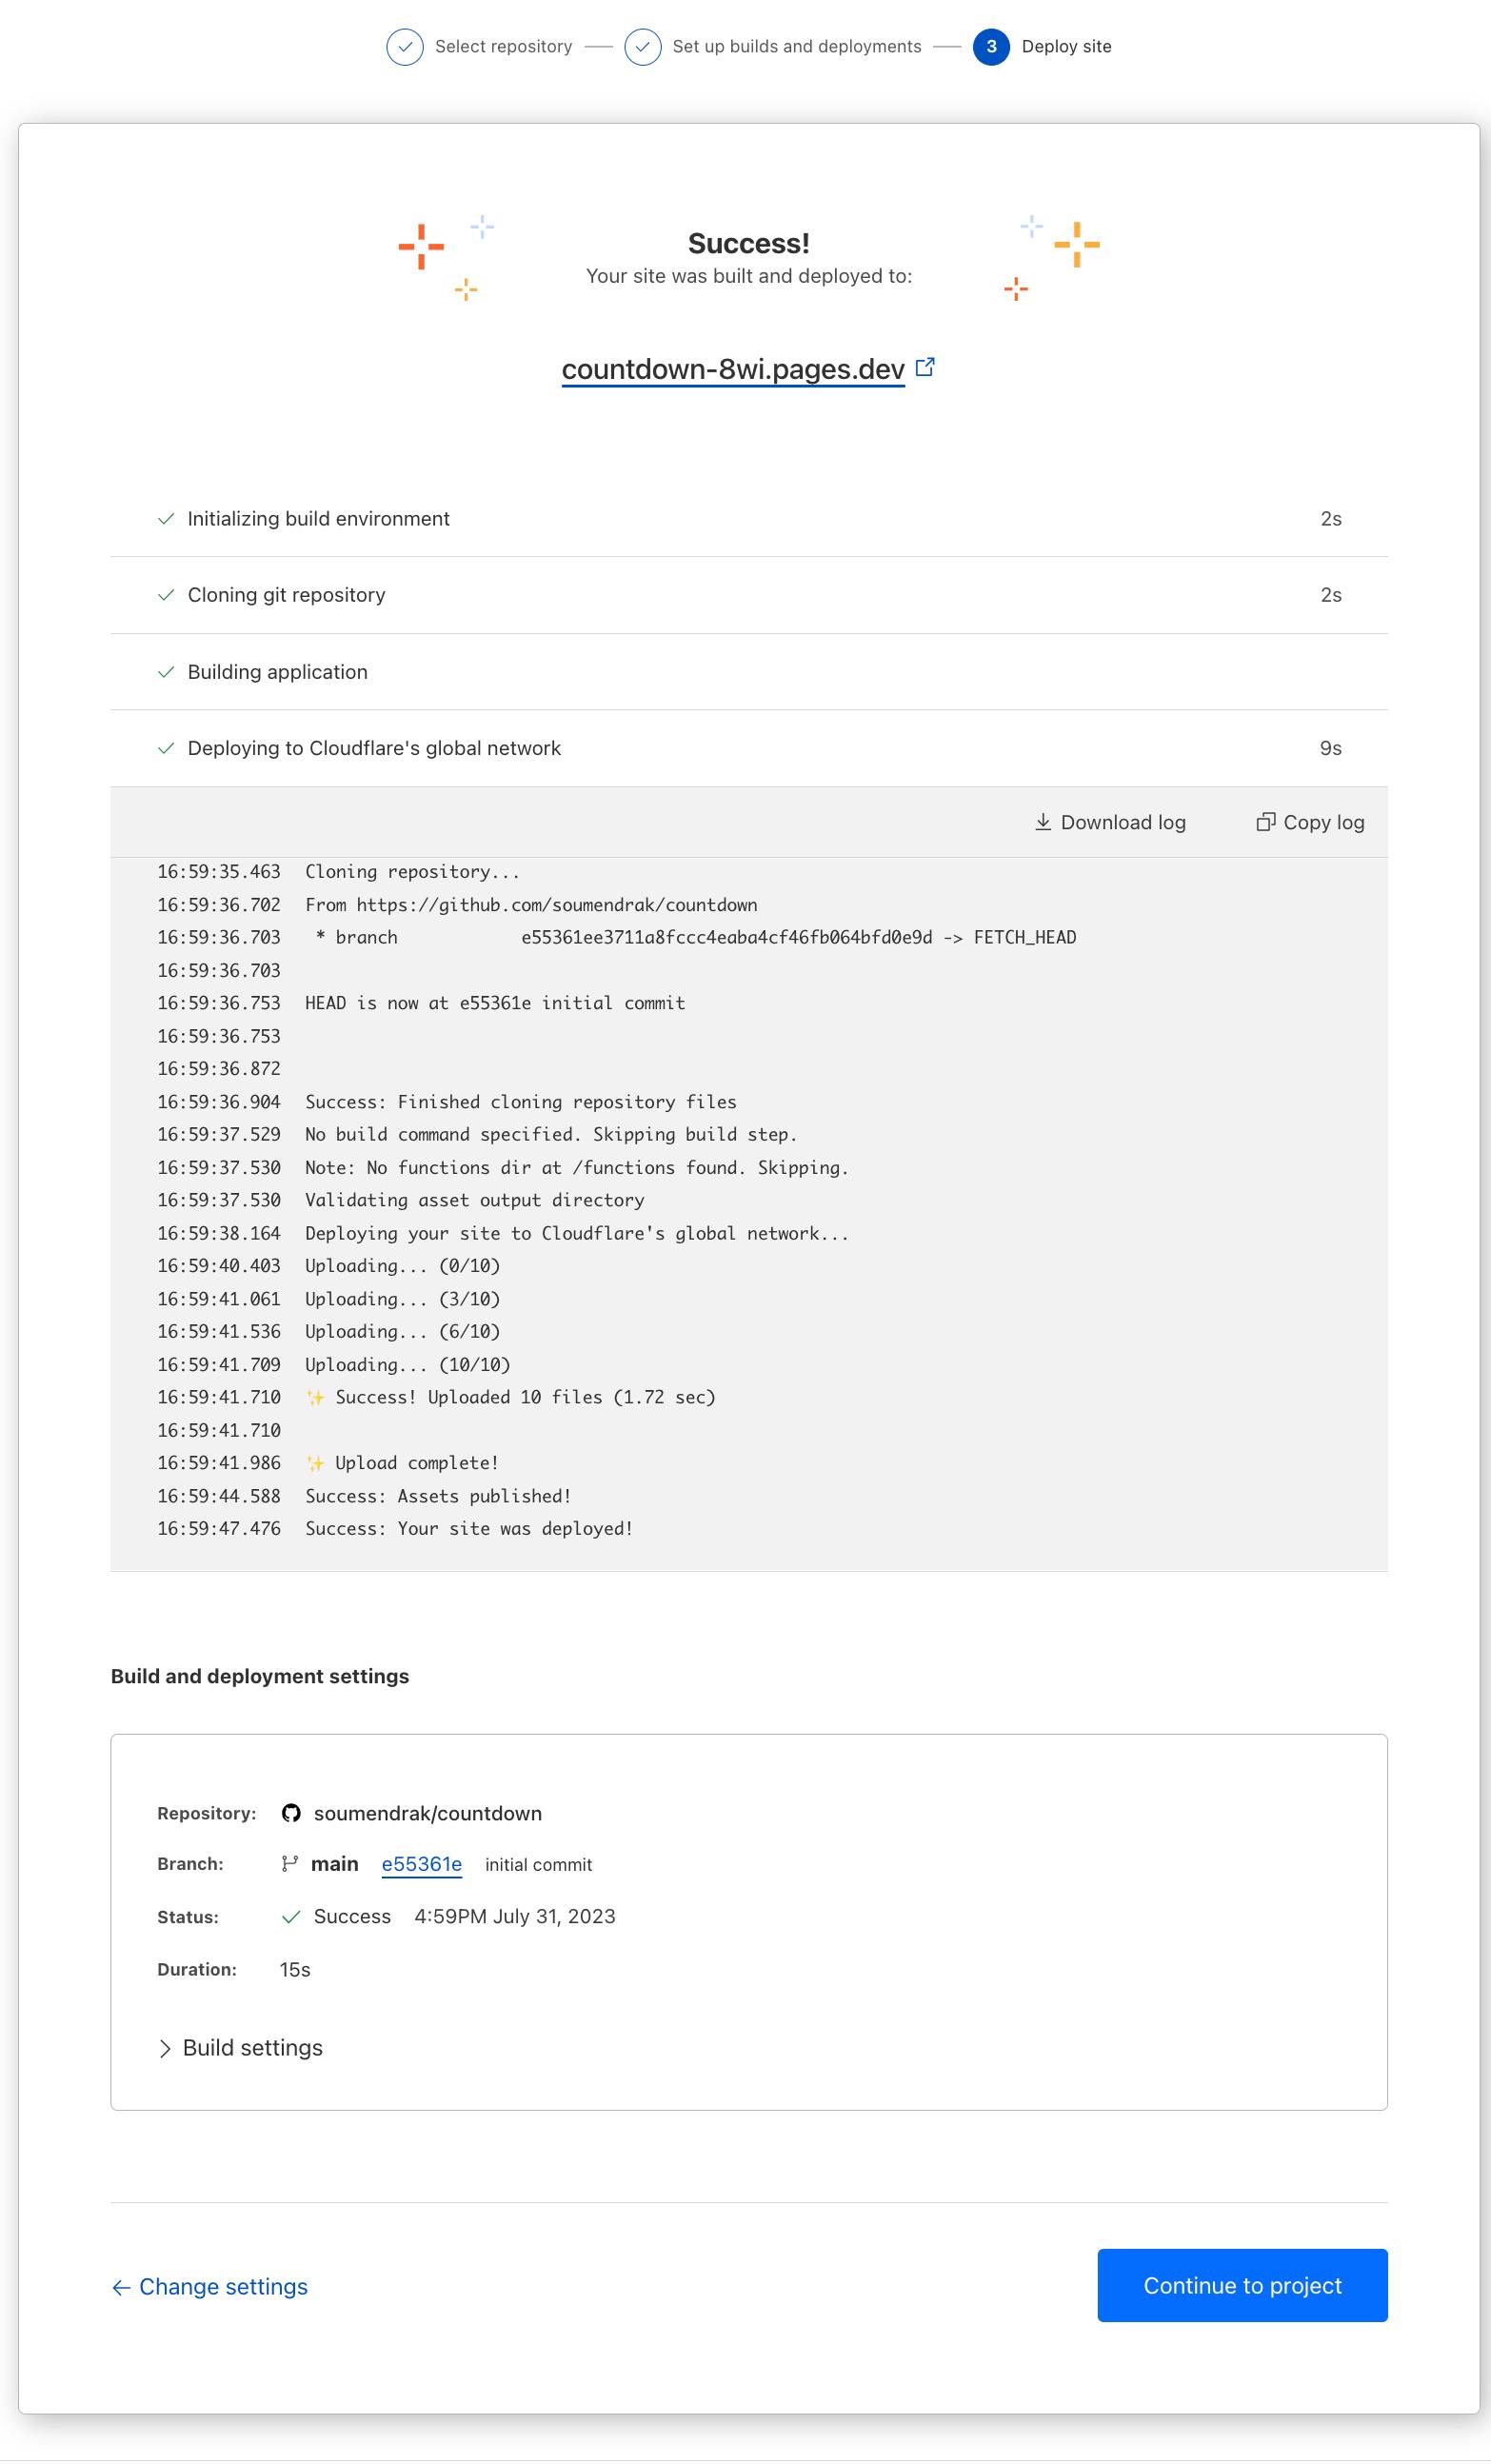
Then click the 'Save and Deploy' button.
Click on 'Continue to Project' after the build gets over.
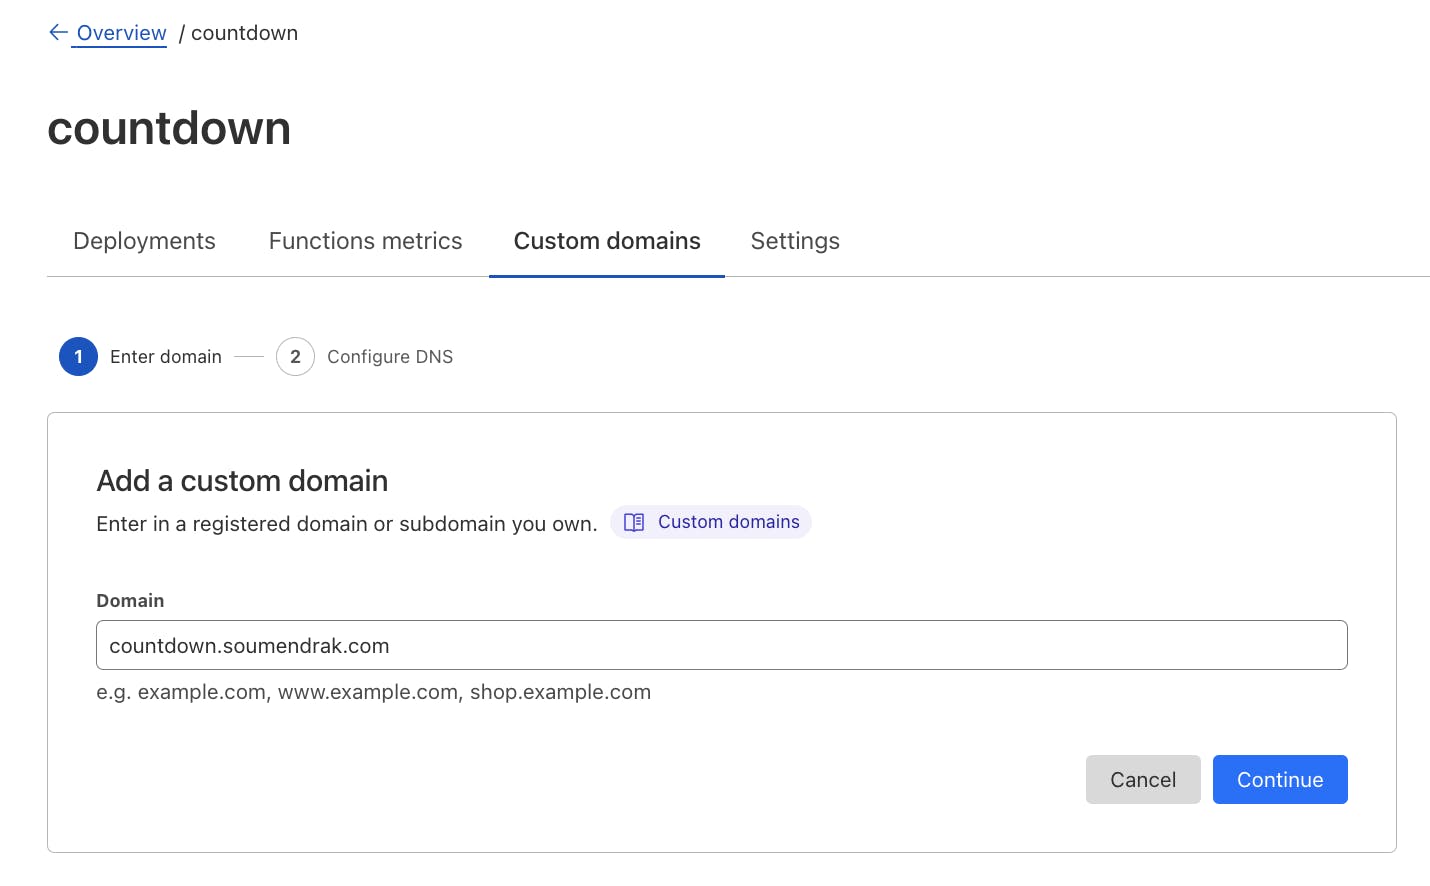
Click on the 'custom domain' tab to link to your previous custom domain. Click 'Set up a custom domain'

Fill out the site and click on the Continue button. Do not use http/https
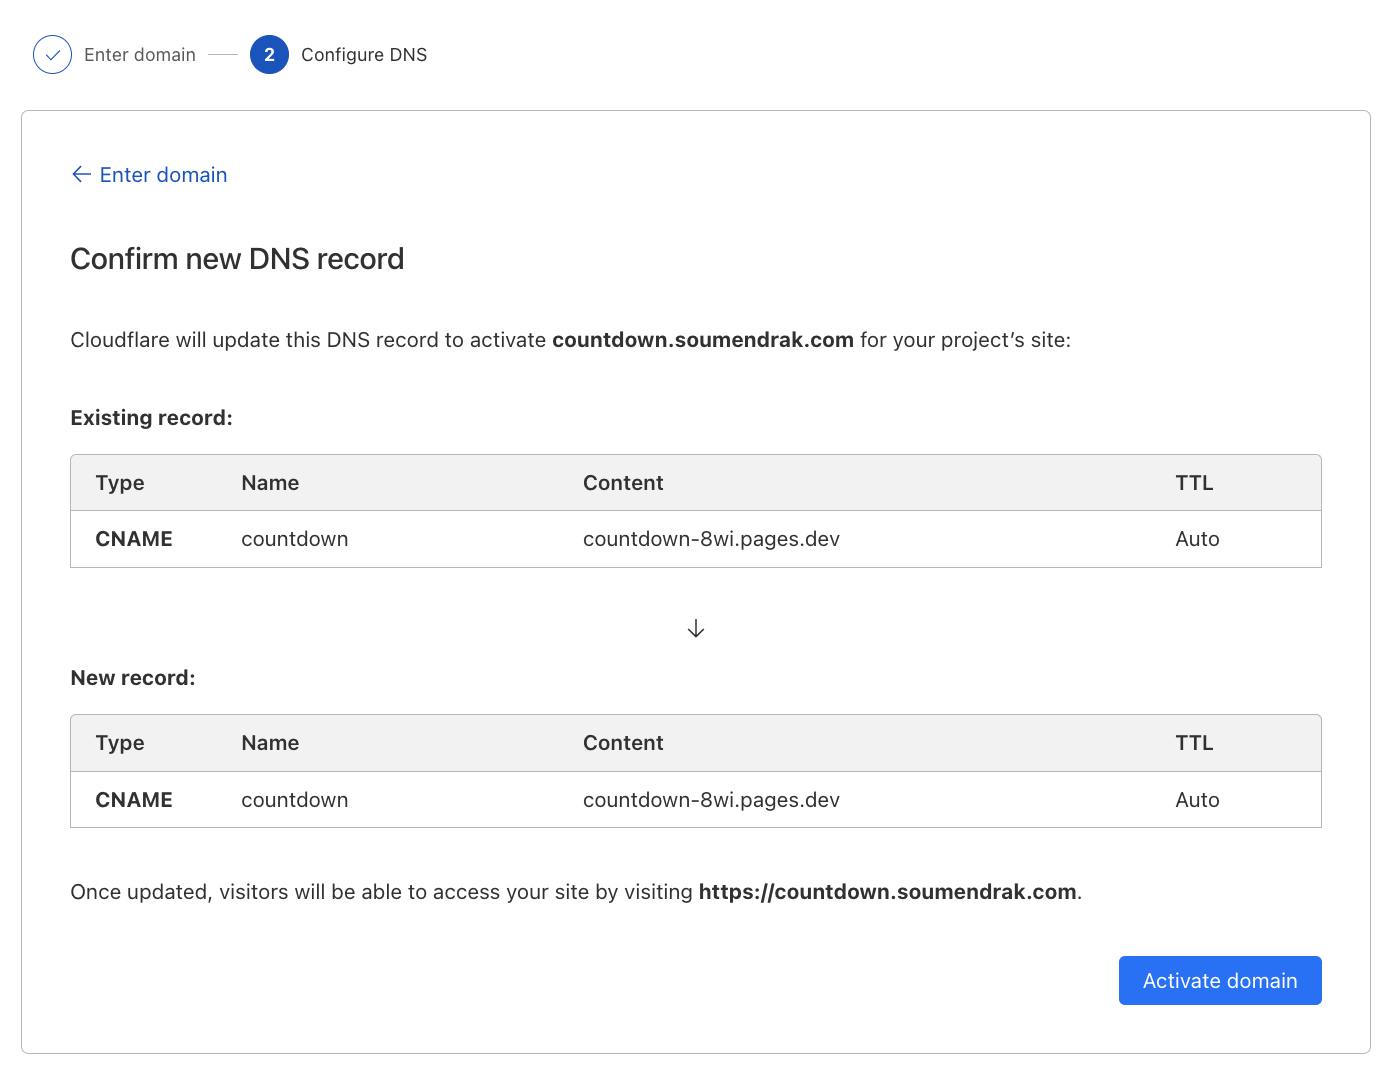
Make the DNS record changes as shown.

After making the changes, the existing and new records will become the same, then you can click on the 'Activate domain' button.
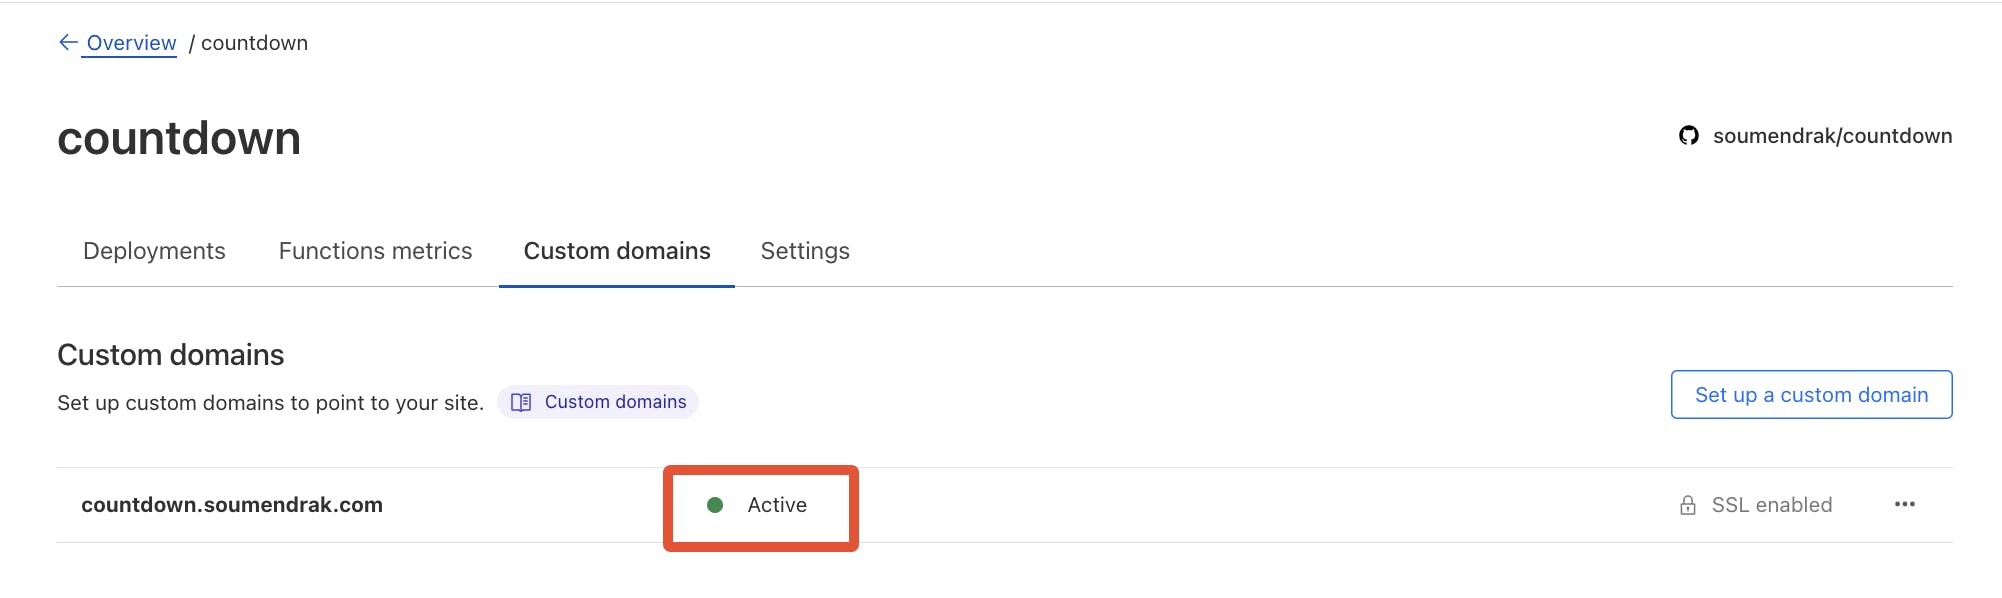
Once it shows Active, the process is completed.
Summary
In summary, we have witnessed how to migrate from carrd.co single page website to freely hosted Cloudflare pages. We have downloaded the website from carrd.co, version managed the website assets in GitHub. We have hosted the site with an auto-generated SSL certificate on Cloudflare pages.
If you have any doubts, please comment. If you have any specific requirements, please contact me on Twitter or LinkedIn.